
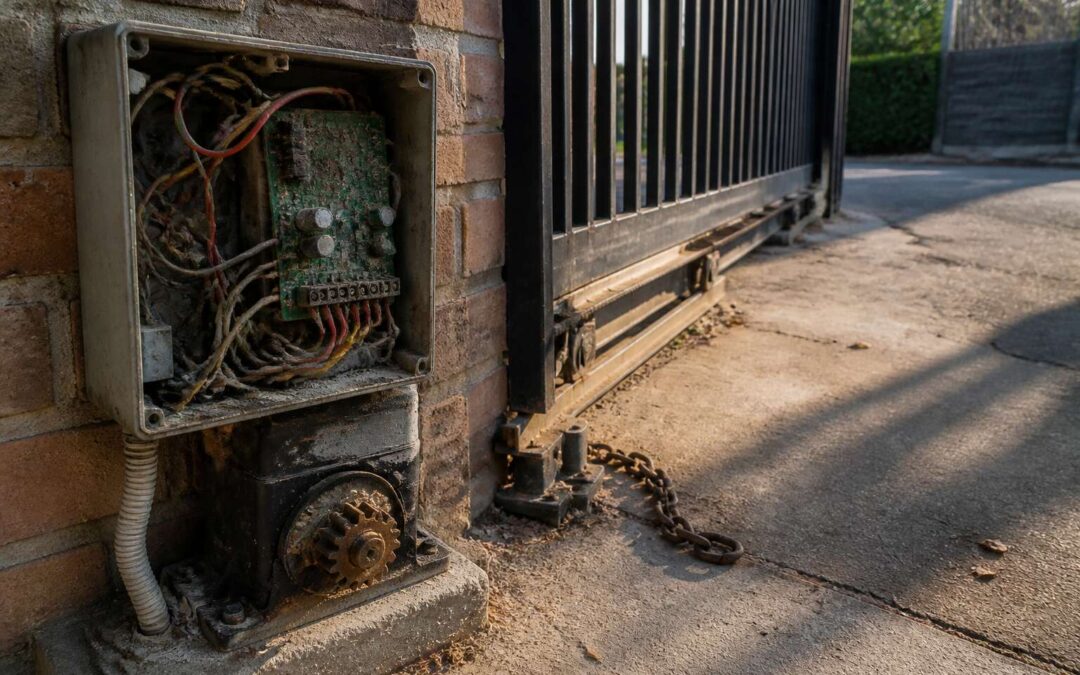
Common Warning Signs Your Automated Gate Is Struggling
Intermittent Operation or Complete Stoppage
Arriving home to a gate that refuses to move is a special kind of frustration. Intermittent operation is worse because it gives you false hope. One day it glides open, the next it stops dead. Complete stoppage is the final stage of a gate motor faulty breakdown. Watch for these warning signs:
- The gate hums but does not move.
- It reverses direction for no reason.
- It responds only after multiple attempts.
These symptoms point to issues like a failing gearbox, faulty limit switches, or a weak backup battery. A gate that acts this way is not being difficult. It is signalling a mechanical failure. South African homeowners face enough load shedding without adding gate drama to the mix.
Grinding, Screeching, or Clicking Noises
Your gate should move with quiet precision. When grinding, screeching, or clicking noises interrupt the expected silence, the mechanism is under stress. These sounds escalate quickly in South African heat and dust!
Each sound has a distinct cause, and each points toward a gate motor faulty in its own way.
- Grinding means stripped teeth on the drive gears or foreign material caught in the gearbox.
- Screeching indicates a dry bearing or a chain running without proper lubrication.
- Clicking often signals a failing relay or a limit switch that cannot maintain contact.
Ignoring these sounds only guarantees a larger repair bill later. The noise is the first honest sign of a mechanism wearing itself out.
Gate Opens or Closes at a Crawl Pace
Your gate takes thirty seconds to open when it used to take ten. That crawl pace is not a random slowdown. It is a deliberate warning from the motor, a sign that internal components are under duress. In South African heat and dust, this condition worsens quickly.
The cause of a gate motor faulty often sits in low hydraulic fluid, worn gears, or a mains voltage drop. Each of these makes the motor labour harder, producing that sluggish, hesitant motion you see at the gate.
Watch for these accompanying cues:
- The motor hums but the gate barely moves.
- The gate stops and starts during a single cycle.
- The motor casing becomes too hot to touch.
These signs confirm a gate motor faulty that will not fix itself. The motor still runs, but it is failing.
Remote Control Range Suddenly Decreases
Your gate used to answer from the driveway. Now you must press the remote three times from the pavement and still walk closer! That shrinking range carries meaning. The receiver board inside the motor is losing sensitivity because the supply voltage sags or the heat from the casing has degraded its components. In South African conditions, this degradation points to a gate motor faulty.
The remote’s batteries can be changed, but a fresh set altering nothing means the problem lives inside the motor housing. I see homeowners ignore this symptom until the motor stops entirely.
- Range falls from fifteen metres to under three in a few weeks.
- The gate responds only after repeated presses.
- Fresh batteries change nothing.
That last point is the clue. A gate motor faulty with a failing receiver will not recover on its own. The receiver degrades until the gate only moves when you stand beside it.
Diagnosing Power Supply and Electrical Connection Problems
Checking the Main Power Source and Fuse
Electricity is the lifeblood of your automated gate, and when the current runs dry, the system falls silent. In South Africa, where load-shedding adds an extra layer of complexity, a simple power outage often masquerades as a serious mechanical failure. This is the first place to look when you suspect your gate motor faulty. You must verify the incoming supply before you ever consider the motor itself. The fence standing static might not be a motor problem at all, but rather a missing spark of life from the grid.
The unassuming offender is often the fuse. A blown fuse is a quiet, invisible tragedy that stops the entire show. Before you call a technician, or purchase expensive new parts, perform a methodical check of the electrical pathway. This is a process of elimination that saves time and money.
1. Inspect the main isolation switch to ensure it is in the “ON” position.
2. Examine the fuse holder for any signs of scorching or a broken wire within the glass cartridge.
3. Use a multimeter to test the voltage at the terminal block where the mains supply enters the motor controller.
You must ensure the connections are tight and free of corrosion. Loose terminals create resistance, which generates heat and causes intermittent drops in power. This heat can warp the plastic housing and eventually char the wires, leading to a complete failure. If you find a burnt smell or visible melting, the issue extends beyond a simple drain on the batteries. It points to a draw that is exceeding the circuit’s capacity. In these cases, the gate motor faulty diagnosis often leads back to the battery charger circuit.
Once you have established that power reaches the unit, test the standby battery voltage. The batteries are the heart that keeps the gate beating during outages. A battery that reads below 12 volts under a light load will not provide the torque needed to lift the gate. It will struggle, click, and then give up. The beauty of the system is its simplicity. You can isolate the problem by bypassing the automation. Manually disengage the clutch and try to move the gate. If it moves with ease, the fault is definitely in the electrical supply. If it is still stiff, you have a mechanical issue. This simple test separates the two worlds of failure. It is a beautiful piece of logic that prevents you from going down a rabbit hole of repairs, ensuring your gate motor repair in Johannesburg or Cape Town is swift and accurate.
Inspecting Wiring Terminals for Corrosion and Loose Connections
Terminals corrode in silence. By the time a gate motor faulty complaint reaches us, the copper inside the junction box carries a grey-green film that blocks current. Power reaches the controller but goes no further. The gate twitches, clicks, and falls quiet. Blame the motor all you like. Check the connections first.
A thorough inspection takes minutes. Power off, cover removed, eyes on every screw terminal. Gently tug each wire. A loose connection slides out without resistance. This is common in South African installations, where heat cycles and vibration loosen fittings.
- Terminal screws should be firm, not spongy.
- Wire ends should be bright, not tarnished.
- Insulation should be flexible, not brittle.
When you find corrosion, cut the cable back to fresh copper and re-terminate it. Smearing grease over the mess only postpones the failure. A gate motor faulty after a storm often traces to water creeping into the junction box.
Testing the Transformer and Backup Battery Health
A gate motor faulty diagnosis often skips the transformer entirely. That is a mistake. The transformer steps down mains voltage to something the controller can use. When it fails, the gate acts starved of power, sluggish, twitchy, or flat out dead. Test the transformer with a multimeter. Measure the secondary side under load. A transformer that reads correct volts when idle but drops under load is dying. Also check the backup battery. South African installations suffer here. Load shedding cycles hammer batteries. A battery that holds 12 volts but collapses to 10 when the motor draws current will cause a gate motor faulty complaint every time.
- Check the voltage at the battery terminals with the gate idle.
- Watch the voltage while the gate moves. A drop below 11 volts means the battery is finished.
Evaluating the Control Board for Burnt Components
Power supply faults are often overlooked. The transformer and battery can test fine, yet the gate still fails. The problem lives in the electrical path between them. Check for voltage drop across connectors and switches. Measure at the controller terminals, not just at the source. That reading reveals the true health of the circuit.
The control board stores evidence. Open the housing and inspect for burnt components. Look for discoloured resistors, cracked solder, or swollen capacitors. A charred trace on the PCB means the board is done. Heavy load shedding often causes this damage. A gate motor faulty complaint after a surge points to the control board first.
- Test every connector for tension.
- Flex the harness while measuring continuity.
- Smell for ozone around the relays.
Burnt relays leave a distinct odour. If the board shows any of these signs, replace it. Patching never holds.
Verifying Safety Sensor and Photo Eye Alignment
Most gate motor faulty diagnoses start at the wrong end of the circuit. The transformer reads fine at idle. The battery holds charge. Yet the gate refuses to move. The culprit is often voltage drop under load. Measure at the controller terminals while the motor strains. A reading that sags below spec exposes a weak connection or undersized cable. Trust that reading!
Safety sensors cause their share of gate motor faulty reports. Photo eyes fail silently. Dust, spider webs, or direct sunlight can blind them. Check the LED indicators on both units. A steady glow means the beam is intact. A flicker means trouble.
Inspect the lenses and brackets:
- Wipe lenses with a dry cloth
- Tighten any loose mounting hardware
- Clear obstructions from the beam path
- Confirm both units face each other squarely
A misaligned photo eye stops the gate mid-travel. The motor runs, the gate reverses, and the fault seems random. It is not.
Mechanical Wear and Tear Behind Motor Failures
Worn Gears and Sprockets That Slip
Gears fail quietly. The sprocket teeth, once sharp, now slope after years of dust and pressure. When they slip, the gate stutters mid-drive, then rests. That stutter is often the only warning of a gate motor faulty.
Mechanical wear does not announce itself with drama. It grinds away in small, incremental losses. The grease turns black! The metal surfaces glaze. The chain, once taut, begins to ride crooked. Common symptoms include:
- Repetitive start stop motion during opening
- A dull ticking sound that increases with load
- Resistance when the gate is pushed manually
These signs point to worn gears and sprockets that slip under load. Replacing them demands precision. Each component must match the original spec, otherwise the damage spreads to the drive shaft.
Broken or Stretched Drive Chains and Belts
A stretched drive chain does not break instantly. It lengthens link by link, and the tensioner reaches its limit. The gate motor faulty diagnosis often starts when the gate hesitates mid-travel before continuing. That pause grows longer each cycle.
Belts fail differently. Heat hardens the rubber, and hairline cracks appear along the inner surface. When the belt loses grip, the motor spins freely while the gate stays put. The whirring sound continues, but the gate does not move.
Visible signs include:
- Sagging along the lower chain run
- A rhythmic slapping sound from the drive housing
- The gate moving in short bursts with pauses
These parts carry the motor’s full force. A broken chain leaves the gate immovable by power, though manual release still works. The operator turns, but the connection is lost.
Misaligned or Bent Gate Tracks
Every gate motor faulty call I’ve inspected shares one hidden factor: the track. Driveway settling in Gauteng, coast humidity in Durban, and the harsh Karoo sun work on that rail. It bends a few millimetres, nothing you
Seized Bearings and Lack of Grease
Most homeowners treat their gate like furniture. They never consider what happens inside the operator unit. The bearings roll silently for years, then they seize entirely. Lubrication dries out. Dust from the Highveld wind packs into every crevice. The motor works harder, draws more current, and eventually fails. A seized bearing often presents as:
- A gate that jerks forward, then stops abruptly
- A whining sound during operation
- A motor housing that feels hot to the touch
No amount of track adjustment fixes this. The damage sits inside the gearbox, where few dare to look. Regular maintenance prevents most of these calls, yet almost no one schedules it. The result is an expensive gate motor faulty diagnosis that could have been avoided with a few drops of grease. Once the bearings weld themselves to the shaft, the entire drive assembly needs replacement. That cost rises quickly. A second gate motor faulty report usually follows within weeks, because the new parts strain against the same neglected mechanism.
Faulty Limit Switches Triggering False Shutoffs
Open a failed gearbox and you will see the damage. Worn worm gear teeth have lost their profile. The motor spins, but the drive slips. You hear a smooth hum, yet the gate barely moves. That is not electrical. That is mechanical fatigue. Many gate motor faulty reports miss this because the damage sits beneath layers of grease and rust.
Limit switches create a separate set of issues. These small devices tell the motor when to stop. A worn microswitch can trigger a false shutoff mid-travel. The gate halts at the same point every time, responding to a signal that no longer exists. Dust and oxidised contacts cause this. The switch sparks internally, loses continuity, and fools the control board. I have swapped out dozens. One small replacement often clears the problem.
Obstructions and Debris Blocking the Gate Path
Mechanical wear inside the motor housing can outlast the visible components. Carbon brushes wear down, the commutator develops scoring, and the windings lose their insulation. The motor still draws current, but torque fades. A gate motor faulty diagnosis often stops at the control board when the real problem sits deeper.
- Windblown sand from a dusty plot
- Oak leaves or pine needles packed into the track
- Small stones lodged against the wheel rail
Obstructions and debris blocking the gate path put strain on the whole system. The motor keeps pushing, the clutch slips, and the limit switches misread the position. In South African suburbs, a dirt driveway or a leaning branch causes more damage than a burned-out component.
Environmental Factors That Damage Gate Motors
Water Ingress and Rain Exposure
South African summers deliver rain like an overzealous barman pouring a double shot. Your gate motor bears the brunt. Water ingress sneaks past seals, corrodes terminals, and short-circuits the control board. One solid thunderstorm can transform a healthy unit into a gate motor faulty case faster than load shedding ruins a braai.
Rain exposure accelerates rust on metal gears and bearings. Moisture also wreaks havoc on limit switches and safety sensors, creating phantom signals that confuse the motor. A list of water damage indicators includes:
- Corrosion on the terminal block
- Moisture droplets inside the housing
- Rust streaks on mounting brackets
- Frequent tripping of the overload protector
Check your gate motor’s weatherproofing before the next downpour. Cheap rubber gaskets harden and crack after months of UV exposure. Replace them annually. Position the housing away from direct rain paths. Ignore this and a gate motor faulty diagnosis becomes a seasonal ritual.
Extreme Heat and Cold Affecting Motor Performance
South Africa’s extremes punish gate motors in ways rain cannot. Summer heat bakes the housing until internal temperatures soar past the motor’s design limits. Thermal overload protection trips, leaving you stranded with a gate motor faulty unit. The lubricant inside the gearbox thins and runs off, accelerating wear on every moving part.
Winter cold brings its own misery. Metal contracts, bearings tighten, and the motor strains to move a gate that glided yesterday. Frost forms on exposed terminals, creating intermittent electrical faults that mimic a dying control board. A diagnosis in July often traces back to a brittle plastic gear or a seized shaft.
Dust, Dirt, and Sand Accumulation
Dust, dirt, and sand are relentless in South Africa. The Highveld winds carry fine grit that settles into every crevice of the motor housing. Once inside, that abrasive dust mixes with the lubricant and turns it into grinding paste. I have seen gearboxes that looked like sandblasting chambers. The result is a gate motor faulty unit laboring before its expected lifespan.
The problem worsens near the coast or on undeveloped stands. Windblown sand blasts the shaft, strips paint, and pits metal.
- Fine dust packs into limit switch housings, causing false triggers.
- Sand grains wedge between worm gear and sprocket, accelerating wear.
- Dirt buildup on control board creates a thermal blanket that retains heat.
Each grain works slowly, but cumulative damage is severe. The motor draws more current, temperature rises, and protection circuit cuts out. By the time the owner reports the gate motor faulty unit, the repair bill is substantial.
Pest Infestation Inside the Motor Housing
The warm, dark interior of a gate motor housing is prime territory for South African pests. Geckos congregate near the transformer for warmth. Cockroaches and crickets feed on greasy residue. Ants drag sand and organic matter into the relay chamber, creating conductive bridges between terminals.
- Gecko urine corrodes solder joints and control board traces.
- Rodents chew through rubber grommets and enamel wiring.
- Spider webs accumulate on limit switch levers, obstructing their travel.
This hidden ecology produces intermittent faults that mimic electrical failures. The first sign is often a gate motor faulty unit tripping its thermal protector for no apparent reason. I once opened a housing to find a dormouse nest packed against the live terminals. When the interior is finally exposed, the technician finds droppings, chewed insulation, and sometimes a shed snake skin.
DIY Troubleshooting Steps Before Calling a Technician
Performing a Manual Release and Re-Engagement
Most homeowners discover the manual release lever only when the gate sits shut on a Sunday afternoon. That panic often leads to damaged mechanisms, because forcing an engaged motor can strip internal teeth. The release disengages the motor from the drive system, allowing the gate to move by hand.
Before touching anything, confirm the gate is closed or blocked. Pull the release cord or key, usually attached to the motor housing. You should feel a distinct click. Then, attempt to move the gate manually. If it resists, check for a second lock point or a physical obstruction.
When the technician arrives, they will likely ask if you performed a manual release correctly. If you didn’t, a gate motor faulty diagnosis could become a full replacement instead of a simple reset. Re-engage the system only when the gate is in the open or closed position, never halfway.
Cleaning the Track and Lubricating Moving Parts
A gate motor faulty report often starts with a simple sight: a gate that stops halfway or runs unevenly. The track is the first place to look. Over time, leaves, dust, and small stones accumulate in the channel. Clean the track thoroughly before inspecting the motor itself.
- Remove loose debris with a dry brush.
- Wipe the track with a damp cloth to pick up fine grit.
- Check the wheels for embedded stones.
Once the track is clean, lubricate the moving parts. Use a silicone based lubricant on rollers and hinges. Do not use grease; it collects dirt. A well lubricated gate moves with less strain on the motor, which reduces the chance of a gate motor faulty failure. This simple routine takes ten minutes and often avoids an expensive service call.
Resetting the Circuit Breaker and Re-Pairing Remotes
Before you dial the technician, there are two demons you can exorcise yourself. The first is the circuit breaker. A gate motor faulty diagnosis often becomes a simple reset. Locate the breaker feeding the motor, usually in the main DB box. Switch it off, wait thirty seconds, and switch it back on. This clears the ghost voltage that sometimes lingers after a surge.
The second is the remote pairing. If the motor hums but the remote does nothing, the receiver may have lost its memory. Re-pairing is straightforward:
- Press and hold the learn button on the control board until the LED blinks.
- Press the remote button twice in quick succession.
- Wait for the LED to stay solid, then test the gate.
A gate motor faulty report often ends with a simple re-sync. Try these steps before paying for a service call. They cost nothing and take five minutes.
Inspecting and Tightening Loose Hardware
A gate motor faulty diagnosis often begins with a rattle. Loose hardware creates the same symptoms as a failing motor. You can check this yourself before a technician arrives.
Look at the brackets holding the motor to the wall or post. In South Africa, wind and constant vibration work the bolts loose over time. Take a spanner and tighten every nut you can see. Pay attention to the drive arm and hinge points. Also check the bolts on the gate panel itself, since a loose hinge bracket makes the motor work harder and wear out faster.
- Check the bolts on the motor bracket.
- Tighten the locknuts on the drive arm.
- Inspect the mounting plate for cracks.
A gate that jerks or stutters is often just a loose pin. Tighten it and the gate motor faulty sign disappears. Five minutes with a spanner beats a service call every time.
Testing Safety Reverse Functionality
Before you surrender to the cost of a service call, test the safety reverse function yourself. This mechanism halts the gate when it meets resistance. Place a sturdy object, like a filled wheelie bin, in the gate’s path. Press the close button. A healthy gate stops and retreats within one second of contact.
Check the force settings on the motor unit, since many South African installations are set too aggressively. Break the photoelectric beam with your hand to confirm the gate halts immediately. Inspect the rubber safety edges for cracks, because our harsh sun degrades them quickly.
- Test both the opening and closing directions.
- Confirm the gate reverses rather than just stopping.
- Listen for a distinct click from the limit switch.
If the gate crushes the obstacle instead of reversing, you have a genuine gate motor faulty condition. Fail this test and the diagnosis is confirmed. Do not delay. This is the difference between a bumped bumper and a trapped child.
When DIY Fixes Prove Unsafe or Ineffective
The most expensive repair often starts with a ten-minute DIY fix. I’ve watched homeowners tighten a screw, apply grease, and assume success. Then the gate motor faulty condition returns, often worse. A fix that works for a day is a warning, not a cure. Before calling a technician, do a clear assessment.
Record the gate’s exact behavior for two days. Does it tremble at the same spot? Does it halt after rain? Time every cycle. Inspect only what is safely visible. Touch nothing that sparks or smells burnt! If the motor housing feels too hot, that is your cue to stop.
Honestly, I’ve seen DIY attempts transform a simple fault into a costly circuit board replacement. When you feel uncertain, step away. Your family’s safety outweighs the cost of a service call.
Understanding Repair Costs and Replacement Options
Typical Cost of Common Gate Motor Repairs
Understanding repair costs starts with knowing what a gate motor faulty unit typically needs. In South Africa, common fixes range from R850 for a sensor swap to R4,500 for a control board replacement. Most owners pay between R1,200 and R2,500 for gear or drive train failures. Replacement becomes logical when the repair estimate exceeds half the price of a new motor. With entry level motors near R2,000 and premium brands like Centurion or ET Systems around R6,000, the numbers guide the decision.
Typical repair price ranges:
- Limit switch replacement: R600 to R1,200
- Transformer swap: R700 to R1,500
- Full gearbox overhaul: R1,800 to R3,200
A motor that fails after seven or eight years often needs multiple new parts. Paying R3,000 to repair that old unit is poor economics. I always ask for a written quote first. Comparing that cost against a new motor’s lifespan saves my clients thousands.
Comparing Full Motor Replacement vs. Component Repair
Few repair decisions feel as unsettling as staring at a gate motor faulty unit and wondering if a partial fix will actually hold. The real question is never which single part broke. It is how many components show wear. A failed limit switch on an otherwise healthy motor justifies a simple repair. When the unit struggles, produces grinding sounds, and draws excess current, component repair becomes a temporary patch rather than a durable solution.
- One failed part, clean internals, and regular servicing history: repair the component.
- Multiple worn parts, corroded boards, or visible oil leaks around the gearbox: replacement wins.
A motor that has served eight years rarely has one isolated fault. Replacing the gearbox while the control board is failing means a second labour charge within months. The cost of a new motor looks different when spread over ten future years instead of the old unit’s remaining three. When the written quote exceeds that comparison, the gate motor faulty decision resolves itself cleanly.
Warranty Coverage and Claim Process
In South Africa, a gate motor faulty unit typically costs between R850 and R2,500 per repair visit. That figure climbs when secondary damage appears. Warranty coverage can rescue your wallet, but only if you understand the claim process, which is a separate adventure entirely. Most new motors carry a one year warranty, yet the fine print excludes water ingress, power surges, and pest damage.
Before filing a claim, confirm whether the gate motor faulty issue falls under a covered component. Take photos, keep the original invoice, and request a written diagnosis. Submit those documents to the supplier, who then chooses between repair or replacement.
- Water ingress and power surges often void coverage.
- Labour charges may sit outside the warranty.
- Refurbished units sometimes carry a shorter warranty.
Some warranties work on a pro rata basis, so you pay a slice based on motor age. Others force you to use approved installers. A little homework before the breakdown prevents a lengthy dispute.
Upgrading to a More Durable or Smart Motor
The only thing more predictable than load shedding is a second repair bill for the same gate motor faulty unit. After the first breakdown, you pay for new gears. After the second, you start suspecting the technician has a side business in psychological conditioning.
Replacement costs for durable models have dropped, while smart motors now include surge suppression and fault logging. That means you can see exactly why the motor stopped, instead of trusting a vague diagnosis from a man who smells of biltong and hope.
- Surge protectors handle Eskom’s voltage spikes.
- Sealed casings keep out rain and geckos.
- Smart modules send error codes straight to your phone.
If you are staring down a third call-out, the upgrade price shrinks in comparison. A motor engineered for local grids and dusty winds simply ignores the conditions that murder cheaper units.
Preventive Maintenance to Reduce Future Motor Failures
Scheduling Regular Lubrication and Tightening
Two hundred and fifty million rand in property damage. That number represents the cost of gate motor faults South Africans face each year. It is a quiet tragedy of broken mornings and vulnerable homes. A simple ritual of care prevents most of these failures. Preventative maintenance is the unsung guardian of your gateway.
The motor’s heart depends on regular lubrication carried out every three months. This is not oiling a squeaky hinge, but preserving the mechanical soul of your entrance. Without it, metal grinds against metal in a slow, agonising fashion. Combine this with the tightening of bolts and nuts which vibrate loose over time. A loose gate motor faulty unit will always fail sooner.
A maintenance schedule offers clarity:
– Lubricate the track and chain every three months
– Tighten all mounting brackets and hinges
– Inspect the gearbox for oil seepage
I have seen gates last for decades when owners treat them with respect. A gate motor faulty diagnosis rarely surprises those who adhere to this discipline. The ritual protects your investment and your peace of mind.
Cleaning Sensors and Clearing Track Debris
A surprising 43% of gate motor faulty callouts trace back to preventable environmental buildup. Sensors and tracks are the nervous system and roadway of your entrance. A layer of dust, a fallen leaf, or a pebble can disrupt the infrared beam or block the wheels. This triggers a fault that mimics a mechanical failure.
Cleaning the track is a task of minutes. Remove leaves, mud, and small stones. For the sensors, a dry cloth is sufficient. Do not use water or solvents. The goal is to restore the line of sight between the emitter and receiver.
I have learned to check the sensor lenses monthly. A spider’s web or a film of pollen is enough to scatter the light. When the beam fails, the motor thinks there is an obstacle. The gate stops. This is a safety feature, but it is a false positive caused by neglect.
– Clear debris from the full length of the track
– Wipe photo eye lenses with a soft, clean cloth
– Check sensor brackets for shifting or loosening
A gate motor faulty diagnosis is often just a dirty sensor. Address the simple causes first. The system wants to work. Give it a clean path and a clear signal.
Testing Safety Features on a Monthly Basis
Monthly testing of safety features is the most reliable practice against a gate motor faulty diagnosis. I press the obstacle detection button and watch for instant reversal. A sluggish response means the sensor or control board needs attention before a real incident occurs.
Preventive maintenance extends beyond cleaning. Tighten bolts, inspect the gearbox oil level, and verify the battery terminals hold firm. These small rituals cost minutes but spare you the expense of emergency repairs. Consistency matters more than intensity.
- Test both safety edges and photo eyes on the first day of each month
- Listen for unusual whirring that indicates bearing wear
- Check the manual release mechanism for smooth operation
Neglect accumulates quietly, then leads to sudden failure. A structured routine makes a gate motor faulty event rare.
Installing Surge Protectors and Weatherproofing
Load shedding dominates the headlines, but the surge that follows when the grid returns is what damages gate motors. A single voltage spike can stress the control board enough to cause intermittent faults that worsen over time. I always recommend a surge protector rated for at least 20kA, fitted at the motor’s power feed.
Weatherproofing deserves the same attention. The housing may look sealed, but South African sun and rain find every gap. Check the rubber gaskets around the motor cover and the conduit where cables enter. Replace any perished seals and apply a silicone-based protectant to exposed connectors. A bead of neutral sealant around the junction box stops moisture from becoming a conductor.
- Fit the surge protector as close to the motor as possible
- Angle the housing so water runs off, not into, the casing
- Inspect the earth connection at every scheduled service
These small disciplines make a gate motor faulty diagnosis a rare event rather than a common complaint.
Keeping a Maintenance Log and Noting Unusual Symptoms
Many gate motor faulty reports trace back to a skipped check or a missed sound. A small rattle today becomes a stripped gear tomorrow. The cure is unglamorous: keep a maintenance log and record every symptom.
Every month, note the gate’s opening speed, unusual noises, and how the remote responds. Write down the date of each lubrication and the type of grease used. These notes reveal patterns that a busy mind forgets. For instance, if the motor hesitates only after rain, you have a water ingress clue before total failure.
- Record the battery voltage monthly
- Note any delay between remote press and gate movement
- Log the condition of the track after storms or dust events
When a technician arrives, hand them the log. A documented history turns guesswork into diagnosis. That simple discipline keeps a gate motor faulty diagnosis from becoming a monthly ritual.