
Understanding Hansa Gate Motor Components
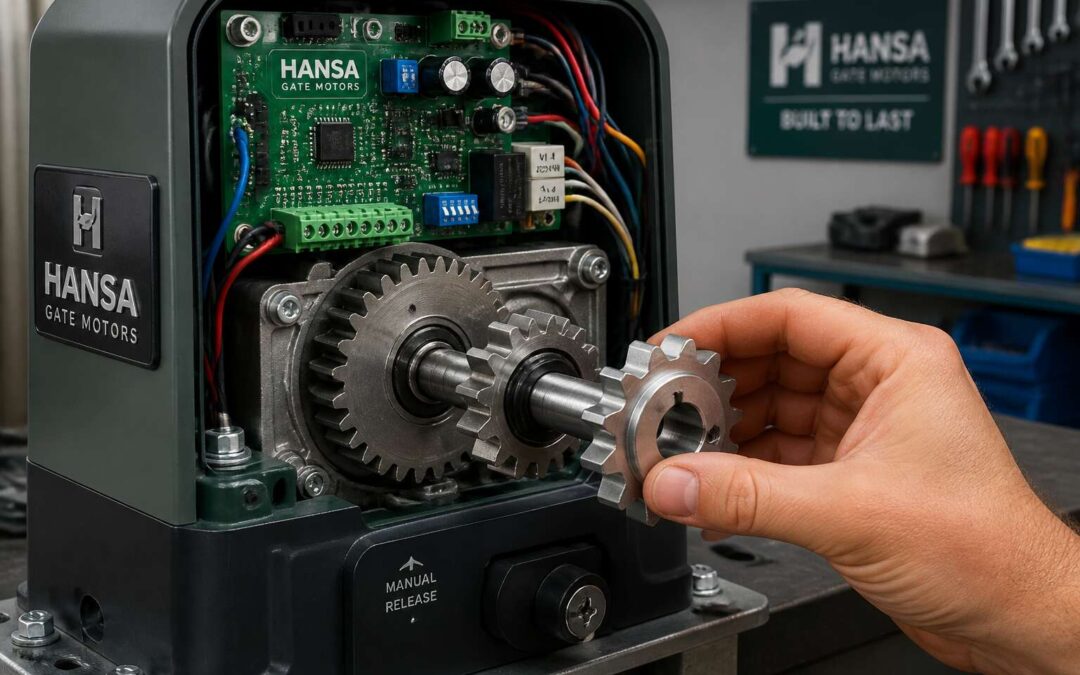
Key Parts That Make Up a Hansa Gate Motor System
A Hansa gate motor system is more than a single box bolted to a wall. It is a precise assembly of mechanical and electronic parts that work in unison. For South African homeowners and installers, knowing each component is the first step toward effective maintenance and procurement of hansa gate motor spares.
The main components you will encounter include:
- The gearbox, which converts motor torque into gate movement.
- The control board, which manages the entire operation.
- Limit switches that tell the motor where to stop.
- The receiver that interprets signals from your remote.
- A backup battery for load shedding.
These parts endure heavy strain. I have seen plastic gears strip, capacitors overheat, and rubber seals crack. Identifying these failures early allows you to order the correct replacement without dismantling the whole unit. That saves time and keeps your gate secure while ensuring your hansa gate motor spares match exactly.
Common Materials and Build Quality of Original Spares
Original Hansa gate motor spares are manufactured to precise tolerances that third-party parts rarely match. The gearbox housing is die-cast from a specific aluminium alloy that dissipates heat efficiently. Cheaper substitutes often use thinner castings that warp under load.
The steel components show similar care. Shafts and fasteners on genuine hansa gate motor spares undergo zinc plating or passivation to resist rust in coastal conditions. This matters in Durban or Cape Town, where salt air corrodes unprotected metal. Electronic components carry conformal coatings against humidity and insect ingress.
- Gears: glass-reinforced polymer
- Seals: nitrile rubber for thermal cycling
- Bearings: sealed units that keep contaminants out
Build quality becomes obvious during installation. Genuine spares slot into place without forcing. When I service gates, I can tell immediately whether I am handling original components. The plastic mouldings align correctly, reducing fitting time and preventing misalignment issues that cause premature wear.
How to Identify Genuine Hansa Replacement Parts
Every counterfeit Hansa sector arm I have removed shows the same fault: a snapped hinge, a bent bracket, and an owner who bought on price. Understanding Hansa gate motor components starts with the limit switch cam, whose precise angular profile is obvious when genuine parts trigger the microswitch at the correct moment. Copies click early or late, so the gate slams.
How to identify genuine hansa gate motor spares comes down to weight and finish. Packaging carries a distinct ink shade and batch code, but the strongest cue is heft. Hold a genuine gearbox cover next to a substitute; the difference is immediate. Moulding seams align cleanly, and etched logos sit inside the housing, not on the surface.
These details matter because hansa gate motor spares determine whether your system fails gracefully or completely. I have seen a generic bracket cost a client R4000 in unrelated damage.
Compatibility Considerations for Different Hansa Models
Compatibility across Hansa models is rarely a question of brand, it is a question of generation. The GTR and DC series share a similar silhouette, but their gearboxes, limit switch cams, and motor mounts are not interchangeable. A mismatch often reveals itself weeks later, when travel stops drift or the motor runs hot.
- Older GTR covers use a wider bolt pattern.
- Newer DC units rely on a reinforced mounting plate.
- Limit switch cam profiles differ between production batches.
Always read the serial code stamped inside the cover. That code tells you which component range your unit belongs to. Ordering hansa gate motor spares without it is a gamble with your gate’s entire drive system.
Signs That Your Hansa Gate Motor Needs Spare Parts
Unusual Noises and Vibrations During Operation
There is a moment when a Hansa gate motor begins to produce sounds that do not belong to its normal rhythm. A low rumble, a shudder through the concrete, a metallic whine that lingers after the gate closes. These are components reaching their limit.
In my experience, vibration is the first clear signal. When the chassis trembles during a standard cycle, the gears are losing alignment. The pitch changes under load, which tells you the drive teeth are wearing unevenly.
- A rhythmic clunk matching each rotation of the wheel
- A high pitched screech at the midpoint of travel
- A dull hammering that appears only in wind
Each symptom points to specific parts. Ignoring them turns a simple repair into a full replacement. The quiet hum of a healthy motor is worth protecting, and any deviation from that hum is a reason to source hansa gate motor spares before the system fails.
Intermittent or Failed Gate Opening and Closing
A gate that opens on Monday, ignores you on Tuesday, then works again on Wednesday is not confused. It is dying! Intermittent operation is the motor’s way of saying it needs attention.
When your hansa gate motor spares start to fail, I have seen the symptoms turn sneaky. The gate might reverse direction for no reason, or stop a metre from the closed position. Sometimes it responds to the remote, sometimes it demands four presses. The motor runs, but the gate stays stuck, which points to a worn gearbox.
- The gate opens fully but refuses to close
- It moves a few centimetres, then stops
- It works in summer, but fails on cold mornings
Each behaviour means a specific component is worn. A failing capacitor causes random stops. A broken limit switch makes the gate think it has reached the end. Order hansa gate motor spares before you are left stranded.
Visible Wear and Tear on Gears, Belts, and Limit Switches
Graveyards don’t creak. Your gate does, and that is a far worse sign. When you finally pull off the cover and look inside, the truth is written in metal dust and rubber shavings. The gears tell stories of every forced push and heavy load. Their teeth become dull, rounded, or chipped from years of grinding against each other. A belt that should sit tight now sags or shows hairline cracks along its length.
The limit switch is the quiet culprit. This small component decides where your gate stops, and when it wears out, the gate’s sense of direction becomes unreliable. The signs are subtle at first, then undeniable:
- The gate touches the closed position, then bounces back open
- It stops short of full closure by a hand’s width
- The motor keeps running after the gate has already stopped moving
Each of these failures points to a specific mechanical breakdown. The gate becomes a physical diary of neglect, and only replacing the damaged pieces with hansa gate motor spares will set things right. No amount of remote control pressing fixes a shredded belt or a stripped gear. You have to open the housing, inspect the parts with your own eyes, and replace what time has destroyed.
Safety Sensor Malfunctions and Obstruction Detection Issues
Safety sensors on a Hansa gate motor have a single job: detect an obstruction and stop the gate. When they start lying, the whole system throws a tantrum. In South Africa, heat, dust, and moisture attack these components relentlessly, making sensor failures one of the most common reasons people search for hansa gate motor spares.
I once watched a gate refuse to close for three days because a single leaf had drifted across the lens. The sensor shouted “obstruction” when the driveway was empty.
- The gate starts closing, then immediately reverses
- It stops halfway and flashes a warning light
- The motor hums but the gate stays frozen in place
Misalignment produces the same symptoms. A sensor nudged by a passing vehicle can’t see its partner across the driveway. Cleaning and realigning fixes some cases. When it does not, the sender or receiver unit has failed internally, and you need hansa gate motor spares to get the gate moving again.
Choosing the Right Hansa Gate Motor Spares
Original Equipment Manufacturer vs. Aftermarket Parts
Choosing between Original Equipment Manufacturer and aftermarket hansa gate motor spares is a bit like deciding who fixes your bakkie. The dealership costs more, but that guy down the road might use cable ties and hope. The real difference shows up when your gate decides to argue with the wind on a Sunday.
What often separates the two:
– OEM spares are machined to factory specifications, no persuasion required.
– Aftermarket parts might fit, though sometimes with creative hammer work.
– Genuine hansa gate motor spares carry warranty support that actually responds.
The extra cost of OEM buys certainty. Aftermarket can test your patience when the limit switch misbehaves mid-week. For homeowners who value sleep, the choice becomes obvious. Pay once, or pay twice with added frustration.
Reading the Model and Serial Number for Accurate Sourcing
Nobody enjoys squinting at a faded sticker on a motor housing in the afternoon sun. That sticker holds your model and serial number. It separates a smooth repair from a week of waiting for the wrong box. The model number tells you the series. The serial number pinpoints the exact production run, which matters more than you think for hansa gate motor spares.
Manufacturers tweak components during production. A 2019 unit might use a different limit switch bracket than a 2022 unit. The serial number narrows the search.
Where to find them:
- Check the side panel of the motor housing, usually near the hinge.
- Look for a silver or white label, not painted-on text.
- Photograph it with your phone.
Trust me, that photo saves phone calls. Suppliers use it to match the exact hansa gate motor spares you need, without measuring bolt holes or counting gear teeth.
Electrical Components: Control Boards, Capacitors, and Transformers
Roughly 60 percent of gate motor failures trace back to electrical components, not mechanical wear. The control board, capacitor, and transformer each carry their own failure signatures. Capacitors bulge at the seam. Transformers develop a low, persistent hum under load. Control boards corrode at their terminals or quietly lose function after a surge.
Ordering hansa gate motor spares for these parts requires more than a matching connector. The control board revision number changes behaviour across production years. The capacitor’s microfarad value and voltage rating determine whether the replacement survives the next summer heatwave. The transformer must match your unit’s input voltage, and this varies sharply across South African installations, believe me!
- Read the revision code printed on the old control board
- Copy the capacitor’s exact ratings from its casing
- Confirm transformer voltage before you order
These numbers are exactly what a reputable hansa gate motor spares supplier will ask you for. They separate a lasting repair from an expensive repeat.
Mechanical Parts: Gears, Chains, and Drive Sprockets
Nobody notices a gate motor’s gears until the gate stops halfway and refuses to budge. That is the quiet failure of mechanical parts, where wear builds slowly. Gears lose tooth profile, chains stretch, and drive sprockets round off under repeated tension. Unlike electrical faults, these parts show visible clues, but only if you look closely.
For hansa gate motor spares, I always compare the old gear’s tooth count and the chain’s pitch size before ordering. South African installations use different drive ratios depending on gate weight and width. A mismatched sprocket causes grinding and slippage within weeks.
- Count gear teeth exactly
- Measure chain pitch with callipers
- Match sprocket bore diameter
These three details ensure the replacement meshes properly with the existing drive train.
Warranty and Return Policies When Buying Spares
The moment you buy a replacement part, the warranty becomes your only protection. Hansa gate motor spares usually carry a six month guarantee, but some suppliers exclude labour costs and courier fees from that promise. I always ask one question before paying: what exactly does the warranty cover?
Most claims fail because the part shows wear, not a manufacturing defect. Gears, belts and capacitors wear out, and no supplier replaces them for free. That is not unfair. It is how warranties work. Confirm a few details in writing:
- the warranty period from the date of delivery
- whether original packaging is required for returns
- the refund process versus replacement
For hansa gate motor spares bought online, return policies often disappear once the package is opened. Ask for the policy document before you order. A supplier who hesitates to provide one is probably not worth your money.
Installation and Maintenance Tips for Hansa Gate Motor Spares
Pre-Installation Checks and Required Tools
A gate motor installation fails long before the motor itself gives out. The culprit is poor preparation. Before fitting any hansa gate motor spares, inspect the gate’s manual movement from end to end. Binding hinges or a dragging gate will wear out new components. Verify the supply voltage with a multimeter, as older South African properties often experience voltage drop under load.
Assemble the correct tools. A spirit level, socket set, torque wrench, and crimping tool cover the essentials. Do not use adjustable spanners on metric fasteners.
- Torque wrench for gearbox mounting bolts
- Spirit level for rack alignment
- Multimeter for continuity and supply tests
With tools ready, inspect the installation environment. The concrete foundation must be cured and free of cracks, and the mounting plate must sit perfectly level. Misalignment remains the leading cause of premature failure in hansa gate motor spares, so verify the torque specifications before tightening.
Step-by-Step Guide for Replacing Common Spare Parts
Once the mounting plate is level and torqued, the real work begins. For a Hansa gate motor, consistent maintenance means checking the drive sprocket for wear every six months and greasing the gearbox with lithium based compound. Always source hansa gate motor spares that match the original part number stamped on the housing.
Common replacements include the limit switch and the capacitor. Follow this sequence:
- Isolate power at the distribution board.
- Remove the covers and photograph the wiring layout.
- Discharge the capacitor with a resistor before handling.
- Fit the new part and verify continuity.
Reassembly is the reverse, but torque the gearbox bolts in a star pattern. A loose chain causes skipped teeth; a tight chain burns the motor bearings. Replace the chain when deflection exceeds 10 mm. Routine inspection of hansa gate motor spares prevents unexpected failures, and keeping the control board dry and free of dust extends its life considerably.
Lubrication and Cleaning Procedures to Extend Part Life
Electronics fail more often from contamination than from electrical faults. In South Africa, a single dusty winter week can deposit enough particulate inside a gate motor housing to bridge low voltage circuits. This is why cleaning procedures matter as much as sourcing hansa gate motor spares.
Use an anti-static brush on the control board and a cotton swab dampened with isopropyl alcohol around relay contacts. For mechanical drive, apply lithium grease to the chain and sprocket teeth. Do not over grease. A thin film is enough. Thick grease traps grit and accelerates wear.
- Wipe the limit switch actuators with a dry cloth monthly.
- Blow out the housing interior with compressed air.
- Check the gearbox oil level and top up with a high pressure rated gear oil.
The true longevity of hansa gate motor spares comes down to this discipline. A cleaned contact stays conductive. A lubricated gear runs cooler and draws less current. Two simple practices, done consistently, turn an ordinary installation into one that outlasts the neighbourhood.
Testing Safety Features After Installation
Around 70% of gate motor failures in South Africa are traced back to installation errors, not component defects. That statistic should reframe how you think about your driveway security. A new set of hansa gate motor spares is only as reliable as the person fitting them, and the safety tests you run afterwards determine whether the system protects or exposes your property.
The first hour after installation is the critical window. Begin with the physical alignment of the optical sensors. They must sit perfectly level and face each other without obstruction, because a misaligned sensor creates a blind spot large enough for a child or pet to slip through. Shield them from direct sunlight, since intense UV glare can cause false signals and phantom stops.
Once the alignment is correct, test the obstruction detection on both the open and close cycles. Place a solid object, like a cardboard box, in the gate’s path and observe the response. A quality unit should reverse within two seconds of contact. If it hesitates, adjust the force limiter on the control board immediately.
The reaction time of your safety system deserves a documented checklist:
– Confirm the auto-close timer activates after the set delay.
– Verify the photo beam interrupts the closing cycle from both directions.
– Test the manual release mechanism while the motor is under load.
– Check the emergency stop function if your model includes one.
Regular testing is not a luxury. Every six months, run a full cycle with a test object and inspect the wiring connections for corrosion, especially after the Highveld thunderstorm season. The safety components are only as strong as the hansa gate motor spares you invested in, and a properly tested system is the difference between a convenience and a liability.
Seasonal Maintenance Schedule for Gate Motor Systems
South African seasons demand more than a cursory glance at your gate motor. The Highveld summer brings thunderstorms, while winter kicks up dust that settles into housings. A seasonal maintenance schedule prevents small issues from becoming expensive repairs.
Twice a year, set aside an hour to check the components that weather affects most. Inspect the battery terminals for the white powder that signals corrosion, particularly after humid spells. Confirm that the gearbox lubricant has not thinned. Look at the wiring looms for cracked insulation, a common failure point after prolonged UV exposure.
A practical routine might include:
- Clean debris from the track and sensor lenses.
- Tighten chain tension and check bolts.
- Test battery voltage before the load-shedding season begins.
These steps keep your hansa gate motor spares working reliably, so the system responds correctly when you need it.
Troubleshooting Issues After Fitting New Spares
Fitting new parts requires patience. The gate motor will behave oddly until everything settles. A newly installed hansa gate motor spares component may stutter or refuse to cooperate entirely. The cause may be simple. The system needs to relearn its own movements.
After replacing a control board, limit switches often demand reprogramming. A new battery may need a full charge cycle to recalibrate the charger. A new gearbox may feel stiff until its bearings bed in. I have seen many homeowners panic at this stage.
A short checklist helps:
- Check for loose earth straps.
- Confirm the transformer output matches the new part.
- Run the gate manually before restoring power.
These diagnostics are the practical manners of gate automation. A motor that misbehaves after new hansa gate motor spares often needs reassurance, not another replacement!