Understanding the Basics of Gate Motors
Types of Gate Motors – Different types of gate motors: underground, articulating, sliding and barrier arm
In the realm of modern security solutions, understanding the nuances of gate motors becomes paramount. With the South African landscape increasingly embracing automated access, knowing how to set gate motor systems optimally can mean the difference between seamless entry and frustrating downtime. The variety of gate motors available reflects diverse architectural needs and security demands, each with its unique mechanism and installation intricacies.
Among the most prevalent types are underground, articulating, sliding, and barrier arm gate motors. The underground variety is favored for its discreet installation, offering a sleek aesthetic while requiring precise calibration—an essential aspect of how to set gate motor correctly. Articulating gate motors are often chosen for their ability to handle irregular spaces, with articulated arms providing smooth operation over uneven terrain. Sliding gate motors, on the other hand, excel in limited spaces, sliding along a track with powerful, quiet operation. Barrier arm systems are typically employed for controlled access points, such as commercial premises or private driveways, requiring careful alignment to ensure optimal functionality. Understanding these differences is crucial for anyone seeking to master how to set gate motor effectively and ensure reliable, long-lasting performance.
Components of a Gate Motor System – Key parts: control box, motor, arms, sensors, remote controls
Understanding the core components of a gate motor system is essential for anyone eager to master how to set gate motor effectively. At the heart of the system lies the control box—the command center that orchestrates every movement. It communicates with the motor, which provides the power needed to open and close the gate smoothly and reliably.
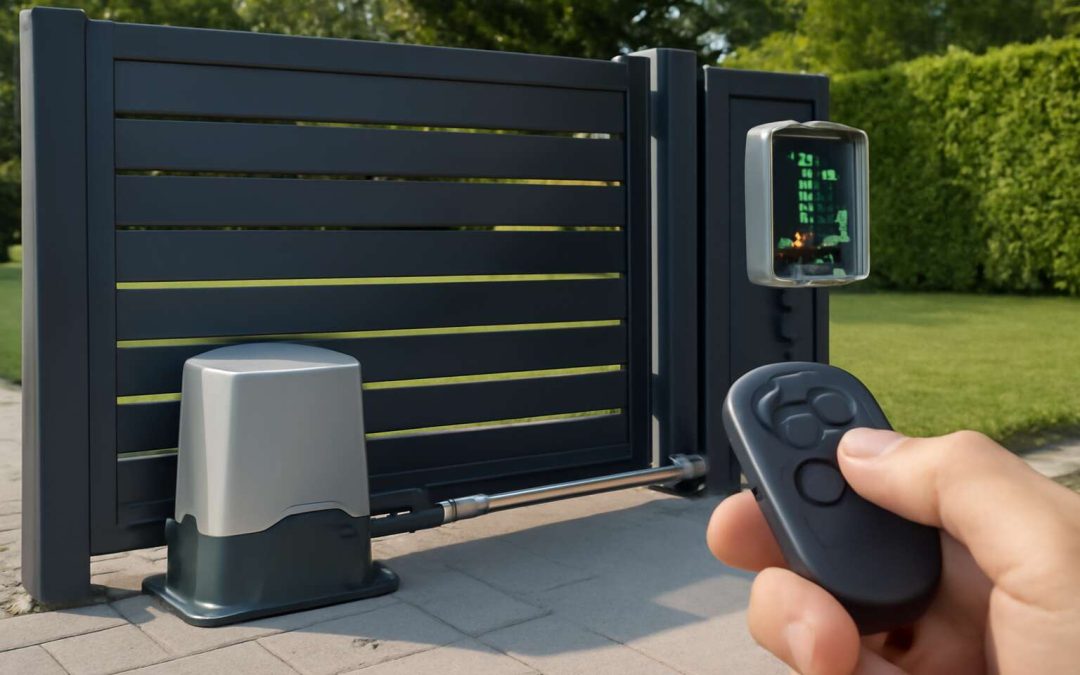
Alongside these, the arms—whether articulated or sliding—are the physical links that translate motor energy into motion, making the gate function seamlessly. Sensors act as vigilant sentinels, detecting obstructions or vehicles, and ensuring safety during operation. For remote operation, remote controls serve as the user’s key to effortless access, transmitting signals that activate the system from a distance.
When learning how to set gate motor, paying close attention to each of these parts is vital. For example, correct sensor placement and calibration can prevent mishaps, while configuring the control box properly ensures consistent performance. Remember, a well-tuned system hinges on understanding and maintaining these key components—an essential step in mastering how to set gate motor for reliable security and convenience.
Advantages of Installing a Gate Motor – Enhanced security, convenience, automation benefits
Understanding the basics of gate motors reveals why they are an indispensable feature in contemporary security systems. A well-chosen gate motor does more than just open and close; it elevates your property’s safety and convenience to new heights. With automation, the daily chore of manual gate operation becomes a thing of the past, replaced by seamless, effortless access.
The advantages are plentiful—enhanced security, of course, tops the list. No longer do you need to worry about uninvited guests or weather conditions making gate operation cumbersome. Instead, you enjoy the luxury of remote controls, allowing you to open your gate from the comfort of your vehicle or even your couch.
In South Africa, where security is paramount, installing a gate motor offers peace of mind. When learning how to set gate motor, it’s crucial to understand that proper calibration and component placement are vital to optimal performance. Whether you’re installing a sliding or articulated system, the benefits are undeniable: a safer, more convenient lifestyle!
Preparing for Installation and Setup
Choosing the Right Gate Motor – Factors to consider: gate type, size, weight, environment
In the grand tapestry of modern security, understanding how to set gate motor systems is a vital thread that weaves safety with sophistication. Before embarking on this journey, consider the unique nuances of your property—its size, environmental conditions, and the weight of your gate. A well-chosen gate motor not only enhances convenience but also becomes a steadfast guardian of your sanctuary in South Africa’s diverse landscape.
Preparation begins with a meticulous assessment of your gate’s specifications. For instance, a heavy, wrought-iron gate demands a robust motor, while a lightweight aluminum gate may suffice with a more modest model. Environmental factors—such as exposure to rain, wind, or coastal humidity—should influence your choice, ensuring durability and longevity. Remember, selecting the right gate motor involves evaluating multiple factors including gate type, size, and environmental resilience, all of which influence the installation process and long-term performance.
- Determine the gate’s weight and dimensions to match with the motor’s capacity.
- Consider environmental exposure to select weather-resistant features.
- Evaluate space constraints for installation, especially for sliding or articulating gates.
- Consult with professionals who understand how to set gate motor systems tailored to South African conditions.
Ultimately, choosing the correct gate motor is a dance of precision and foresight—an investment that transforms the mundane act of opening a gate into a seamless, almost poetic gesture of security and grace.
Tools and Equipment Needed – Required tools: drill, level, measuring tape, safety gear
Embarking on the journey of how to set gate motor is akin to preparing for a grand expedition—every detail matters, and the right tools are your trusted companions. Before you dive into the installation, gather a selection of essential equipment to ensure a smooth and precise setup. A sturdy drill, a level to guarantee perfect alignment, and a measuring tape to mark accurate positions are indispensable. Safety gear—gloves, goggles, and sturdy footwear—must never be overlooked, as the process involves powerful components that demand respect and caution.
Once equipped, consider the layout and space constraints of your property. To facilitate a seamless installation, follow this simple sequence:
- Mark the mounting points carefully, using the measuring tape for precision.
- Ensure the motor’s position aligns perfectly with the gate’s movement path, employing the level to verify alignment.
- Securely drill holes for mounting brackets, double-checking measurements at each step.
With these preparations, you lay the groundwork for a successful installation, transforming what may seem like a daunting task into a manageable, even satisfying, craftsmanship. Remember, understanding how to set gate motor hinges on meticulous planning and the right tools—your gateway to enhanced security and effortless automation in South Africa’s vibrant landscape!
Safety Precautions – Ensuring safety during installation to prevent accidents
Embarking on the journey of how to set gate motor can be an intricate process—one that demands unwavering focus on safety. With powerful components involved, a single oversight can lead to accidents or damage, turning a straightforward task into a hazardous ordeal. It’s vital to treat every step with respect and caution. Before starting, ensure your workspace is clear of obstructions and that all safety gear is at hand. Gloves, goggles, and sturdy footwear are non-negotiable; they provide essential protection against unforeseen mishaps. Remember, safety isn’t just about personal protection but also about safeguarding your tools and surrounding environment.
As you prepare, consider implementing a safety checklist to keep track of critical precautions. If you’re unfamiliar with the process of how to set gate motor, consulting the manufacturer’s instructions can prevent costly errors. When working with power tools and electrical connections, double-check all connections and switch off power sources during installation. This disciplined approach not only guarantees your safety but also ensures the long-term reliability of your gate automation system. In the end, meticulous safety precautions turn a potentially hazardous task into a professional, satisfying achievement—bringing peace of mind along with the convenience of automated security.
Step-by-Step Guide to Setting a Gate Motor
Installing the Gate Motor – Mounting the control box and motor unit securely
Setting a gate motor is an act of precision and patience, a delicate dance between engineering and artistry. Once the control box and motor unit are securely mounted, the journey toward seamless automation begins. Proper placement not only ensures durability but also optimizes functionality, transforming a simple gate into a sentinel of security and convenience. The process involves meticulous alignment—every bolt tightened, every sensor calibrated—to guarantee smooth operation for years to come.
Before diving into the installation, it’s essential to understand the importance of stability. Securing the control box in a sheltered location protects it from the elements, while the motor unit must sit firmly on a stable foundation. This step often involves a careful measurement of the gate’s weight and size, ensuring the motor chosen is suitable for the task. Remember, the key to how to set gate motor lies in attention to detail and an unwavering commitment to safety.
In the quest for a flawless setup, consider these critical steps:
- Align the motor and control box precisely with the gate’s movement path
- Ensure all mounting brackets are tightly fastened to prevent any wobbling
- Test the motor’s response before finalizing the installation
With patience and care, installing the gate motor transforms from a daunting task into a rewarding achievement—one that elevates your property’s security and convenience with effortless grace.
Connecting the Power Supply – Proper wiring and electrical considerations
Embarking on the journey of how to set gate motor is akin to orchestrating a symphony—each connection, each wire, a vital note contributing to harmonious automation. As you prepare to connect the power supply, remember that proper wiring and electrical considerations are the backbone of a reliable, long-lasting installation. A misstep here can echo through years of operation, so precision is paramount. Carefully inspect the voltage requirements and ensure your power source can handle the motor’s demand, avoiding the peril of overloads or electrical shorts.
Next, proceed with connecting the control box to the power supply, adhering strictly to the manufacturer’s wiring diagram. It’s often wise to use high-quality cables and secure all connections with tight crimps or terminals, preventing corrosion and ensuring safety. For added peace of mind, incorporate a residual current device (RCD) or circuit breaker—these act as vigilant guardians, halting electrical flow in the event of a fault. When wiring, consider the following steps:
- Switch off the main power before starting any electrical work.
- Use insulated tools to protect against accidental shocks.
- Double-check polarity and wiring continuity.
Once the wiring is complete, a gentle test of the motor’s response—activating the remote or manual switch—will reveal if the connections are sound. Remember, how to set gate motor hinges not only on the mechanics but also on the integrity of the electrical artery that powers it. Meticulous attention here ensures the heart of your automation beats steady and true, transforming your gate into a sentinel that never falters.
Configuring Limit Switches – Setting open and close positions to prevent over-travel
Mastering the art of how to set gate motor is a delicate dance, one that transforms an ordinary entrance into a fortress of convenience and security. The secret lies in configuring the limit switches—those unseen guardians that define the precise boundaries of open and closed positions. Without their harmony, the gate risks over-travel, risking damage and malfunction, disrupting the symphony of automation.
To begin, ensure the gate is fully installed and properly aligned. Then, locate the limit switch adjustment screws, often nestled within the control box or on the motor unit itself. Carefully activate the gate’s opening cycle using your remote or manual control. As the gate reaches the desired open position, gently turn the limit switch screw to set the “fully open” point. Repeat this process for the closing position, ensuring the gate halts exactly where it should—neither over-traveling nor stopping short.
Some systems employ an
- automatic calibration mode
—a feature that simplifies this process. If not, manual adjustments are essential, requiring patience and a keen eye. Remember, how to set gate motor hinges on precise positioning; the limit switches are the silent conductors that keep the rhythm steady. Proper configuration guarantees smooth operation, extending the lifespan of your investment and preserving the integrity of your automation. In this dance of mechanics and electricity, every turn of the screw is a note in the melody of seamless access—one that echoes long into the future.
Programming Remote Controls – Pairing remotes and defining user access
Programming remote controls for your gate motor is a crucial step in creating a seamless and secure entry system. The process begins by locating the remote control pairing button, often situated inside the control box or on the motor unit itself. With the gate in a stable, closed position, press and hold this button until the indicator light flashes—signaling the system is ready to pair a new remote.
Next, press the button on the remote control you wish to pair. The system will typically respond with a flash or beep, confirming the successful pairing. If you need to define user access or add multiple remotes, repeat this process for each device, ensuring everyone’s access is properly programmed and secure.
- Ensure the remote batteries are fresh for reliable operation.
- Test each remote after programming to confirm proper pairing.
Understanding how to set gate motor programming remote controls is fundamental to maintaining control over who enters your property, adding an extra layer of security and convenience. Proper setup isn’t just about technology—it’s about asserting your sovereignty over your space in a world that constantly challenges boundaries.
Adjusting the Motor Speed and Force – Ensuring smooth operation and preventing damage
Setting a gate motor isn’t merely a technical chore; it’s an act of asserting sovereignty over your sanctuary. Among the myriad of tasks involved, adjusting the motor speed and force is paramount to ensure smooth operation and avoid premature wear and tear. A motor that moves too swiftly or applies excessive force risks damaging both the gate and its surroundings—hardly the kind of security upgrade one envisions.
To fine-tune your gate motor, begin by accessing the control panel. Most systems feature a dedicated adjustment knob or digital interface for setting the motor speed and force. Typically, these controls are nestled within the control box, awaiting a gentle touch. Slowly increase the speed to a comfortable, seamless pace—nothing too hurried, lest the gate becomes a reckless projectile. Conversely, dial down the force to prevent undue strain, especially in windy South African conditions where gusts can test the limits of even the sturdiest gate.
For precision, consider using a small, levelled object or measuring tape to observe the gate’s movement. Some advanced models offer built-in sensors—think of them as the gate’s personal bodyguards—helping to calibrate force settings with finesse. Remember, the goal is harmony: a gate that glides gracefully without banging or jerking, and a motor that breathes life into automation rather than fighting against it.
- Adjust the speed gradually, testing after each tweak.
- Ensure the gate opens and closes without resistance or unusual noise.
- Verify that safety features, like sensors and limit switches, are functioning correctly to prevent over-travel.
Mastering how to set gate motor adjustments transforms a simple automation into a symphony of precision—an essential skill in the pursuit of a secure, stylish, and effortlessly operational driveway. After all, a well-calibrated gate motor is the silent sentinel guarding your domain with quiet dignity and unwavering reliability.
Additional Settings and Customizations
Setting Safety Features – Integrating sensors like photocells and safety edges
In the labyrinthine corridors of automation, safety remains the silent sentinel—guarding both lives and investments. When learning how to set gate motor, integrating sensors such as photocells and safety edges transforms a mundane installation into a bastion of security. These devices act as invisible guardians, detecting motion or obstacles and halting operation before catastrophe strikes. Without them, even the most sophisticated gate motor risks turning into a deadly trap, especially in the unpredictable South African environment where wildlife and children often share the pathways.
To elevate safety to an art form, consider these essential components:
- Photocells that cast an invisible beam across the driveway, instantly stopping the gate if anything crosses their path.
- Safety edges fitted with sensors along the gate’s edge, which trigger an immediate reverse if pressure is detected.
- Emergency stop buttons strategically positioned for quick manual intervention in emergencies.
When configuring how to set gate motor with safety features, meticulous calibration is paramount. Every sensor must be aligned perfectly, ensuring seamless communication between hardware and firmware. Remember, safety isn’t merely a feature; it’s the backbone of reliable automation—an invisible shield that transforms a simple gate into a fortress against the chaos of the outside world. Proper integration of these sensors lends an aura of control, allowing you to operate your gate with confidence, knowing that unseen eyes watch over every movement in the shadows.
Adding Manual Override Options – Ensuring manual operation during power failure
In the intricate dance of automation, safety isn’t an afterthought—it’s the heartbeat of every reliable gate motor system. When learning how to set gate motor with additional customizations, adding manual override options becomes a critical step. Power failures can strike without warning, leaving your gate immobilized and your security compromised. That’s why integrating a manual override ensures you retain control, even when electricity is unexpectedly interrupted.
Most modern gate motors feature a dedicated manual release mechanism. Typically, this involves a simple key lock or lever that disengages the motor from the gate, allowing manual operation. It’s a safeguard that transforms your automated system from a fragile convenience into a resilient fortress. To make this process seamless, it’s essential to familiarize yourself with the specific override instructions for your model. Remember, a well-planned manual override isn’t just a backup—it’s an insurance policy against the chaos of power outages.
Adding manual override options is more than just a feature; it’s a strategic move. When you understand how to set gate motor with these customizations, you ensure continuous access and peace of mind. In environments where unpredictable power fluctuations are common, especially in South Africa, this flexibility can mean the difference between security and vulnerability. Don’t overlook this vital step—it’s the silent guardian that keeps your automation resilient, no matter the circumstances.
Setting Automatic Closing Timers – Configuring delay times for closing and opening
In the symphony of automation, timing is everything—especially when orchestrating the perfect balance between convenience and security. Setting the automatic closing timer on your gate motor is akin to fine-tuning a musical instrument; it requires precision, patience, and an understanding of the delicate rhythm that keeps your property secure. Knowing how to set gate motor with this custom feature transforms a simple device into a vigilant guardian, silently watching over your domain.
The automatic closing timer is a pivotal setting that dictates how long your gate remains open before closing seamlessly behind you. Imagine pulling into your driveway, confident that your gate will close quietly after a specified delay—no need for manual intervention, no lingering vulnerabilities. This feature’s elegance lies in its simplicity: it can be tailored to fit your lifestyle, whether you prefer a swift closure or a more leisurely pace.
Most modern gate motors allow you to configure this delay with ease. Usually, the process involves accessing the control panel or programming menu, where you can adjust the timer to your desired duration. For those unfamiliar, the journey to mastering how to set gate motor with these customizations can seem daunting at first. However, with patience and a clear understanding of your system’s manual, you’ll soon find yourself navigating these settings with confidence.
In environments like South Africa where power fluctuations and unpredictable weather are common, the strategic use of automatic closing timers offers a layer of resilience. It ensures that your gate doesn’t remain open longer than necessary, safeguarding your property against unwelcome guests or wildlife. When you master how to set gate motor with such precision, you enhance not only security but also the overall harmony of your automated system.
Testing and Troubleshooting
Initial Testing Procedures – Checking movement, safety features, and remote operation
Once the installation of your gate motor is complete, the true test begins—an eerie dance of precision and safety that reveals the soul of the mechanism. Testing the motor’s movement is essential, for a sluggish or erratic response hints at lurking issues that could compromise security. Watch closely as the gate swings open and closes, ensuring it moves fluidly without resistance or hesitation. Safety features, like photocells and sensors, must react instantly to obstacles, creating an invisible shield against accidents. Remote operation should feel seamless—press a button, and the gate obeys with unwavering obedience.
To ensure everything functions as it should, it’s wise to perform initial testing procedures in a methodical manner. Start by manually activating the gate to observe its full range of motion, then proceed to test remote controls from various distances. If the gate stalls or runs beyond its designated limit, it’s time to revisit the configuration of limit switches. Troubleshooting often involves checking connections, recalibrating sensors, and verifying that safety features are correctly integrated. Remember, a well-tested gate motor is the first line of defense against unforeseen dangers lurking in the shadows of automation.
Common Issues and Solutions – Addressing connection problems, sensor misalignments, motor sounds
Even the most sophisticated gate motor system can be rendered ineffective if not properly tested and troubleshot after installation. A common hurdle faced by installers is connection issues—poor wiring or loose terminals can cause intermittent operation or complete failure. It’s essential to double-check all electrical connections, ensuring they are secure and correctly insulated. Sensor misalignments are another frequent culprit; photocells and safety sensors must be precisely aligned to prevent false triggers or failure to respond. When sensors are out of sync, they compromise safety and frustrate users.
Unusual motor sounds—grinding, whining, or humming—are often indicative of underlying mechanical or electrical problems. Such noises may point to inadequate lubrication, misaligned components, or motor overload. If you notice these symptoms, it’s crucial to investigate the source immediately. Troubleshooting might involve inspecting limit switches, recalibrating sensors, or adjusting the force settings to ensure smooth, silent operation. Remember, how to set gate motor effectively hinges on diligent troubleshooting; the devil is often in the details.
- Start by verifying wiring connections, ensuring they adhere to the manufacturer’s schematic.
- Check sensor alignment, making sure photocells face each other directly without obstructions.
- Listen carefully to motor sounds, diagnosing abnormal noises that may signal mechanical issues.
By systematically addressing these common issues, you can restore your gate motor to peak performance, ensuring it operates seamlessly and safely. Troubleshooting is not just about fixing problems; it’s about understanding the intricate dance of technology and environment that governs each gate’s behavior. That’s the essence of mastering how to set gate motor for long-term reliability and security.
Maintenance Tips for Longevity and Performance
Regular Inspection and Cleaning – Keeping components free of debris and corrosion
Maintaining your gate motor isn’t just about keeping it operational; it’s about safeguarding your investment and ensuring seamless performance year-round. Regular inspection and cleaning are fundamental steps in extending the longevity of your gate motor. Over time, dirt, dust, and debris can accumulate around moving parts, causing unnecessary strain and potential malfunctions. A quick wipe-down and gentle brush of components like the motor and control box can prevent costly repairs down the line.
Corrosion is another silent enemy, especially in South Africa’s varied climate. Applying a light coat of lubricant to hinges, gears, and sensors can help ward off rust and corrosion. Remember, a well-maintained gate motor operates more smoothly, reduces energy consumption, and minimizes the risk of sudden breakdowns. For those wondering how to set gate motor correctly, diligent maintenance is an essential prerequisite to proper setup and ongoing operation. Keep debris at bay and your gate motor will thank you, providing years of reliable service!
Lubrication and Wear Prevention – Properly lubricating moving parts
In the symphony of automation, the lifeblood of a seamless gate operation lies in meticulous maintenance, particularly in the realm of lubrication and wear prevention. A gate motor, much like a finely tuned instrument, demands tender care to perform its best and stand the test of time. Properly lubricating moving parts such as hinges, gears, and sensors creates a silken glide—reducing friction and preventing premature wear that can lead to costly repairs.
In South Africa’s diverse climate, where humidity and dust can conspire against mechanical harmony, applying a high-quality lubricant not only guards against rust but also ensures the motor runs with quiet efficiency. To achieve this, consider an approach that involves a gentle, even coat of lubricant, focusing on key components that bear the brunt of daily use. This simple act of preservation can transform the lifespan of your gate motor, keeping it performing smoothly for years to come.
For those curious about how to set gate motor properly, attention to wear prevention through consistent lubrication is an indispensable step. Remember, a well-lubricated gate motor minimizes energy consumption and reduces the risk of sudden breakdowns, acting as a silent guardian of your security and convenience. When every part moves harmoniously, your gate becomes not just a barrier, but a testament to the enduring beauty of diligent maintenance!
Updating Software and Firmware – Ensuring the system operates with the latest features
Maintaining peak performance of your gate motor isn’t just about initial installation; it’s about ongoing vigilance. Regularly updating the software and firmware ensures your system embraces the latest features and security patches, transforming your gate into a fortress of automation. Imagine a system that adapts seamlessly to changes—this is the power of keeping your software current. It’s a step that often goes unnoticed but can dramatically extend the lifespan of your gate motor and enhance its reliability.
For those curious about how to set gate motor effectively, understanding the importance of firmware updates is essential. Most modern gate motors come equipped with smart capabilities, allowing remote updates through a simple connection. This process not only improves performance but also safeguards against vulnerabilities—an invisible shield protecting your property. A straightforward approach involves accessing the control panel, downloading the latest firmware from the manufacturer’s website, and following the step-by-step instructions. The result? A system that’s not just functional but optimized for peak efficiency.
In addition to software updates, performing routine inspections and cleaning can prevent issues before they escalate. Dust, dirt, and humidity—especially prevalent in South Africa’s varying climate—can sabotage sensitive components. Regularly check and clean sensors, control boards, and connections. Incorporate a routine checklist that includes:
- Inspecting wiring for wear or corrosion
- Testing safety sensors for proper alignment
- Verifying remote control operation and battery health
Keeping your gate motor in prime condition isn’t a one-time effort; it’s a continuous process that combines strategic updates with vigilant maintenance. When you understand how to set gate motor correctly, the result is a harmonious blend of security, convenience, and longevity—making your automated gate not just a barrier but a guardian of your peace of mind.