Understanding Your Gate Motor Battery
Types of Gate Motor Batteries – Explore the different types, such as lead-acid and lithium-ion batteries, and their characteristics
In the intricate dance of modern home security, understanding the nuances of gate motor batteries is paramount. Recent surveys reveal that over 70% of gate malfunctions stem from battery-related issues, underscoring the importance of discerning the differences among battery types. The two predominant varieties—lead-acid and lithium-ion—each possess unique characteristics that influence their lifespan and performance. Lead-acid batteries, long favored for their affordability and robustness, tend to be heavier and require regular maintenance, while lithium-ion batteries are celebrated for their lightweight design and longevity, albeit at a higher initial cost.
When contemplating how to replace gate motor battery, recognizing the specific demands of your system becomes vital. The choice hinges on factors such as power needs, environmental exposure, and budget constraints. For instance, lithium-ion batteries, with their superior energy density, are often more suitable for high-traffic or remote installations. Conversely, lead-acid batteries might suffice for less demanding applications, provided they are maintained properly. Navigating these options ensures that each replacement aligns with the operational intricacies of your gate, preserving the seamless security it affords.
Signs of a Dying Battery – Identify symptoms like slow operation, failure to open or close, or unusual noises
Recognizing the signs of a dying gate motor battery is crucial for maintaining reliable security. A common indicator is slow operation—when your gate hesitates or takes longer than usual to open or close. You might also notice it failing altogether, refusing to respond when activated. Unusual noises, like grinding or clicking sounds, are often a red flag that the battery is struggling to supply sufficient power.
It’s important to stay alert to these symptoms. If left unchecked, a weak battery can cause complete failure, leaving your gate vulnerable. When troubleshooting, consider these key signs and note any irregularities in performance. Knowing how to replace gate motor battery effectively saves time and avoids costly repairs. Remember, understanding your system’s specific needs ensures each replacement keeps your security seamless and dependable!
Importance of Regular Maintenance – Discuss why consistent checks help prevent unexpected failures
In the grand dance of security, the heartbeat of your gate motor relies heavily on the vitality of its battery. Regular maintenance is the silent guardian that ensures this vital component remains robust, preventing unforeseen failures that can leave your property vulnerable. A meticulous check-up, akin to tending a delicate garden, can reveal subtle signs of wear before they blossom into costly repairs. By understanding how to replace gate motor battery when needed, you preserve the seamless flow of access and safeguard your peace of mind.
Consistent inspections serve as the sentinel against unexpected downtime, allowing you to catch early symptoms like sluggish operation or strange noises. Think of it as tending to a trusted steed—when properly cared for, it performs flawlessly under the most demanding conditions. Integrate simple precautions into your routine, such as monitoring the battery’s voltage and overall performance, and you’ll ensure your gate remains a steadfast guardian rather than a liability.
Preparing for Battery Replacement
Gathering Necessary Tools and Supplies – List tools like screwdrivers, gloves, new battery, and safety equipment
Replacing a gate motor battery might seem straightforward, but preparation is key to ensuring a smooth and safe process. Before diving into the task of how to replace gate motor battery, it’s essential to gather the right tools and supplies. Having everything on hand prevents unnecessary delays and reduces the risk of damaging your equipment.
Start by assembling the necessary tools, including screwdrivers—both flat-head and Phillips—gloves to protect your hands, and safety equipment like goggles. A new, compatible battery is obviously indispensable, so double-check the specifications to match your existing setup. Safety should never be overlooked, especially when working with electrical components, so wearing gloves and goggles can shield you from accidental sparks or contact with corrosive materials.
Once equipped, it’s helpful to have a clear workspace free of clutter. A well-organized environment allows for safer handling of the battery and easier access to the motor. Remember, knowing exactly how to replace gate motor battery with minimal fuss can extend the lifespan of your gate system and prevent costly repairs down the line.
Safety Precautions – Highlight the importance of disconnecting power, wearing safety gear, and handling batteries carefully
Within the realm of gate automation, safety is the enchanted shield that guards both the operator and the intricate machinery. When embarking on the journey of how to replace gate motor battery, it’s vital to cast aside complacency and embrace precautionary measures. Disconnecting the power source acts as the spell to neutralize any lurking electrical currents, preventing unwarranted shocks or accidental activation. This step is crucial—think of it as silencing the guardian spirits before tending to the heart of the system.
Equally important is donning the appropriate safety gear. Protective gloves and goggles serve as enchanted armor, shielding against corrosive leaks or sparks that may ignite from mishandled batteries. Handling batteries with care is essential—these mystical orbs contain potent energy that, if mishandled, could cause injury or damage. Remember, a well-prepared wizard always has their safety talismans close at hand.
Before you begin, ensure your workspace is free of clutter, transforming it into a sanctuary where every tool and component can be attended to with focus. As you navigate the process of how to replace gate motor battery, keep in mind that patience and vigilance will ensure both a successful replacement and the longevity of your gate system. Handling these powerful components with respect can prevent costly repairs and extend your system’s lifespan, turning a mundane task into a ritual of maintenance mastery.
Locating Your Gate Motor Model and Battery Type – Guide on how to find model information and match the replacement battery
Embarking on the quest of how to replace gate motor battery might seem straightforward, but a little prep work makes all the difference. First, you’ll need to locate your gate motor’s model number and identify the specific battery type it uses. This step is crucial—imagine trying to fit a square peg in a round hole! Most gate motors have a label affixed somewhere on the housing, often hidden behind a cover or panel. Carefully remove any protective casing or access panels to reveal this vital information. Once you have the model number, consult the manufacturer’s manual or website to find the exact battery specifications.
To ensure a seamless replacement, it’s wise to keep a handy checklist:
- Model number of your gate motor
- Battery type and voltage
- Tools required for removal and installation
Matching the correct battery is essential—using the wrong one can lead to system malfunctions or damage. Pay close attention to the battery’s dimensions, terminals, and capacity, as these details are your roadmap to a successful swap. With a little detective work, you’ll be well on your way to mastering how to replace gate motor battery and restoring your gate’s smooth operation with confidence and a dash of savoir-faire.
Step-by-Step Guide to Replacing the Gate Motor Battery
Switching Off Power Supply – Explain disconnecting the motor from power source to ensure safety
Before you begin the process of how to replace gate motor battery, safety comes first. The first step is switching off the power supply to avoid any electrical hazards. This simple action prevents accidental activation of the gate motor while you’re working on it. Locate the power source, usually a plug or circuit breaker, and disconnect it. This ensures that no current runs through the motor, reducing the risk of electric shock. Remember, working with batteries and electrical components can be dangerous if proper precautions aren’t taken.
Once you’ve turned off the power supply, it’s wise to wear safety gloves and eye protection. Carefully inspect the area around the motor for any signs of damage or corrosion. Next, remove the cover or casing of the gate motor following the manufacturer’s instructions. This step exposes the battery, making it easier to disconnect and replace. Being cautious during this process minimizes the chance of damaging sensitive parts or hurting yourself.
- Disconnect the battery terminals, starting with the negative (black) lead, then the positive (red) lead.
- Remove the old battery carefully, ensuring it doesn’t fall or leak.
- Insert the new battery in the same orientation, reconnecting the terminals securely.
By following these steps, you’ll understand how to replace gate motor battery safely and efficiently. Ensuring power is disconnected is crucial, especially in South Africa where safety standards are paramount. Proper handling and precautionary measures make all the difference in a successful battery replacement process.
Accessing the Battery Compartment – Instructions on opening the gate motor housing or cover
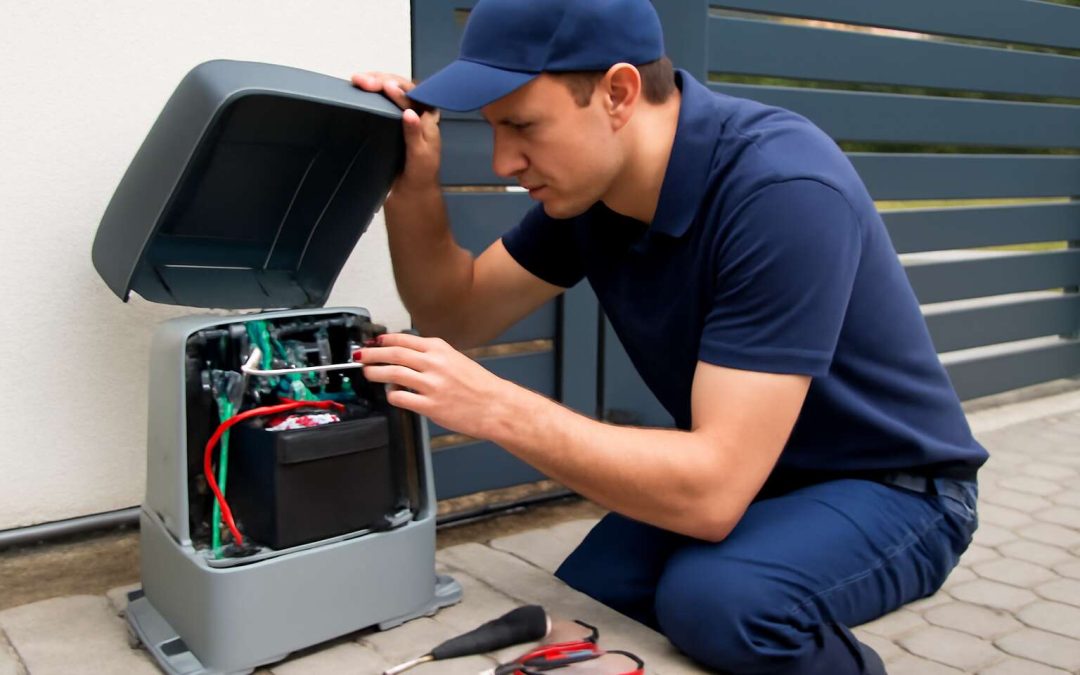
Once the power supply has been safely disconnected, the journey to replacing your gate motor battery begins. Carefully locate the housing or cover of the gate motor, which often resembles a sturdy shell guarding its precious innards. Gently, follow the manufacturer’s instructions to open this enclosure—sometimes it’s a simple clip or screw removal, other times a more intricate process requiring specialized tools.
As you lift the cover, be mindful of the delicate internal components and the battery nestled inside. This is the moment where patience and gentle handling prove invaluable. Inspect the compartment for signs of corrosion or damage, and prepare to disconnect the battery with care. If your gate motor has a complex design, a numbered list can help:
- Remove screws holding the cover
- Carefully lift the casing without forcing
- Identify the battery within the compartment
With the housing open, the pathway to understanding how to replace gate motor battery becomes clear, revealing the heart of your gate’s operational soul.
Removing the Old Battery – Tips for safely disconnecting and extracting the old battery
Once you’ve safely disconnected the power supply, the next step in understanding how to replace gate motor battery is to remove the old one with care. Batteries inside gate motors can be hefty and delicate, so patience is key. Start by carefully disconnecting any terminals or clips attached to the battery, making sure not to use excessive force that could damage internal components. If your gate motor has screws securing the battery in place, loosen and remove them systematically.
To make this process smoother, consider following a simple ordered list:
- Disconnect the battery terminals, starting with the negative (black) side followed by the positive (red).
- Gently lift the old battery out of its compartment, supporting it with both hands to prevent dropping or damaging it.
- Inspect the battery terminals and connectors for corrosion or debris, which can interfere with proper operation of your gate motor.
Removing the old battery carefully ensures you’re prepared to install the new one without risking damage to the sensitive internal parts of the gate motor. Remember, understanding how to replace gate motor battery safely is essential for maintaining reliable gate operation and avoiding costly repairs down the line.
Inspecting and Preparing the New Battery – Check compatibility, remove safety seals if applicable, and prepare for installation
Replacing a gate motor battery might sound like a straightforward task, but it’s one that can easily turn into a mechanical game of Jenga if you’re not careful. Before diving into the hands-on part, inspecting and preparing your new battery is crucial. First, verify the compatibility with your specific gate motor model—using the wrong battery can lead to more headaches than a long weekend without Wi-Fi.
Once you’ve confirmed it’s the right fit, remove any safety seals (if your new battery has them) to activate the cells. Handling batteries with care is paramount, especially since a slip-up could cause damage or injury. To facilitate a smooth installation, consider organizing your tools — you’ll need a screwdriver, gloves, and possibly a bit of patience. Remember, safety gear isn’t just for fashion; it’s your best friend when dealing with potentially hazardous components.
Here’s a quick rundown of how to replace gate motor battery:
- Inspect the new battery for any physical damage or corrosion on the terminals.
- Ensure the connectors are clean and free of debris for optimal electrical contact.
- Support the battery firmly with both hands to prevent accidental drops during installation.
Getting these preparations right helps ensure your new power source will energize your gate effortlessly, keeping it running smoothly and securely for years to come. Knowing how to replace gate motor battery properly isn’t just about convenience — it’s about safeguarding your investment and avoiding costly repairs down the line.
Installing the New Battery – Step-by-step process of connecting and securing the new battery
Replacing a gate motor battery is a task that might seem as simple as flipping a switch, but it demands a touch of finesse and precision. Once you’ve ensured your new battery is compatible and prepared it by removing safety seals, it’s time to move to the actual installation—where many stumble into the Jenga game of wiring and securing the battery firmly. The key is to handle the new battery with care, supporting it with both hands, and making sure the terminals are free from corrosion or debris. This attention to detail guarantees a clean connection and optimal power flow.
Next, carefully align the terminals with the corresponding connectors on your gate motor. If your model has a specific sequence, follow it religiously—skipping steps here can lead to malfunctions or, worse, damage to your motor. To secure the battery, gently press it into the compartment, ensuring it’s snug and immovable. For added reassurance, some models benefit from a small clamp or fastener—check your manual if you’re unsure.
- Connect the positive terminal first, then the negative, to prevent sparks or short circuits.
- Double-check each connection for tightness and cleanliness.
- Finally, ensure the battery is seated properly before replacing any covers or panels.
Once everything is in place, reassemble the housing, restore power, and test your gate’s operation. The process of how to replace gate motor battery, when done methodically, not only restores your gate’s function but also prolongs its lifespan—saving you from costly repairs and unnecessary frustration. Remember, patience and precision are your best allies in this endeavor, turning what might seem like a mundane chore into a demonstration of your technical prowess.
Reassembling the Gate Motor Housing – Guidance on properly closing and securing the cover
Reassembling the gate motor housing after replacing the battery might seem straightforward, but it’s a crucial step often overlooked. Properly closing and securing the cover ensures your gate remains protected from dust, moisture, and pests, which can damage sensitive components. Take your time to align the housing panels correctly, avoiding forced fittings that could crack or misalign the casing.
Once the cover is properly aligned, gently press it back into place, making sure all clips or screws are engaged securely. For models with fasteners, tighten each screw gradually in a cross pattern to evenly distribute pressure. An unfastened or crooked cover not only compromises safety but can also lead to further malfunctions.
To ensure a tight seal, inspect the edges for gaps or misalignment. If the cover has a gasket or rubber seal, double-check its positioning before securing the final screws. This extra step helps maintain the integrity of your gate motor’s housing, prolonging its lifespan and ensuring reliable operation for years to come.
In some cases, a small locking latch or clip might hold the cover in place. Confirm that these are properly engaged before restoring power, especially since a loose cover can cause unexpected issues or safety hazards. Remember, proper reassembly is just as vital as the initial installation when it comes to how to replace gate motor battery effectively—attention to detail here pays off long-term.
- Secure all screws and clips evenly to prevent gaps.
- Ensure rubber seals or gaskets are correctly positioned for weatherproofing.
- Double-check the cover’s alignment before restoring power.
Post-Replacement Checks and Maintenance
Testing Gate Operation – Ensure the gate opens and closes smoothly after replacement
Once you’ve completed the installation of a new battery, it’s crucial to perform post-replacement checks to ensure your gate operates flawlessly. A smooth, reliable opening and closing sequence isn’t just a convenience; it’s a safety feature that protects your loved ones and keeps your property secure.
Begin by testing the gate’s operation several times, observing for any irregularities or delays. If you notice resistance or hesitation, it may indicate an issue with the battery connection or alignment. To confirm that everything functions as expected, systematically go through your gate’s full range of motion, listening for unusual noises that might suggest misalignment or mechanical interference.
- Check the remote control signals to ensure they activate the gate correctly.
- Inspect the safety sensors for proper alignment and cleanliness.
- Verify that the gate opens and closes without abrupt stops or jerks.
Regular testing not only prolongs the lifespan of your gate motor but also guarantees peace of mind, knowing that your gate is operating safely and efficiently after learning how to replace gate motor battery.
Resetting the Gate Motor System – Optional steps for recalibrating or resetting the system if necessary
After replacing the gate motor battery, it’s essential to perform post-replacement checks to ensure everything functions seamlessly. These steps not only confirm the longevity of your new battery but also safeguard your family and property with reliable operation. Carefully observe the gate’s movement, listening for any unusual noises that could hint at misalignment or mechanical issues. If you notice hesitation or jerky movements, it might be due to a loose connection or improper positioning of the new battery.
One helpful step is to reset or recalibrate the gate motor system, especially if it has a built-in memory or safety features. Some models require a simple system reset to recognize the new power source. For example, you might need to press a reset button or follow a sequence in the user manual to recalibrate the system. This process ensures the gate’s sensors and remote controls work in harmony, providing peace of mind for homeowners learning how to replace gate motor battery effectively.
- Disconnect the power supply before attempting any resetting procedure.
- Follow the manufacturer’s instructions for recalibration, often involving holding down specific buttons or opening and closing the gate a few times.
- Reattach the power supply and test the gate’s operation thoroughly.
Regularly performing these post-replacement checks and system resets can significantly prolong your gate motor’s lifespan and maintain optimal safety. In the rural South African landscape, where gates are often the first line of defense, ensuring your gate operates flawlessly after learning how to replace gate motor battery is a small but vital task that offers lasting peace of mind.
Battery Care Tips – Advice on prolonging battery life, such as keeping it charged and periodic inspections
After successfully learning how to replace gate motor battery, the journey doesn’t end there. Ensuring your gate continues to operate smoothly requires diligent post-replacement checks and ongoing maintenance. Regular inspections can catch early signs of battery wear, such as sluggish movements or strange noises, preventing unexpected failures that could compromise security and safety.
One simple but vital step is to keep the new battery properly charged. A well-maintained battery extends the lifespan of your entire gate system. Periodic visual checks for corrosion, loose connections, or leaks help maintain reliability — especially important in rural South African landscapes where gates face harsh elements daily.
- Ensure the battery terminals remain clean and tightly connected.
- Test the gate’s operation at least once a week, listening for any irregular sounds.
- Recharge the battery if you notice it’s not holding a full charge during regular use.
By combining these careful checks and maintenance habits, homeowners can significantly prolong the life of their gate motor battery and ensure the safety of what matters most: family and property. Learning how to replace gate motor battery is just the first step—sustained care keeps your gate reliable for years to come!
Troubleshooting Common Issues During Battery Replacement
Gate Not Responding After Replacement – Possible causes and solutions
Sometimes, even after successfully replacing the gate motor battery, the gate refuses to respond. This can be frustrating, especially when you’re eager to regain control of your property. One common cause is that the new battery isn’t making proper contact with the terminals, which can happen if it’s not seated correctly or if the connectors are dirty or corroded. Checking these connections is a simple yet crucial step in troubleshooting.
Another potential issue is that the system needs a reset after the battery replacement. Modern gate motors often require recalibration or a reset to recognize the new power source. If your gate is still unresponsive, consult the user manual for specific reset instructions. Sometimes, a power surge or static discharge can interfere with the system’s operation. Turning off the power supply for a few minutes before turning it back on can resolve minor glitches. Knowing how to replace gate motor battery is just the first step—ensuring the system recognizes it is equally important.
Battery Not Holding Charge – Diagnosing potential issues with the new battery or system
Battery not holding charge after a fresh installation? It’s a common conundrum that can turn a straightforward task into a frustrating game of hide and seek. When you learn how to replace gate motor battery and still face power woes, it’s time to get to the root of the problem rather than just swapping parts like a game of mechanical musical chairs. The first culprit? The new battery might be too eager to impress but fails to deliver. Sometimes, it’s simply not compatible with your specific gate motor model, or it’s been damaged during transit—because batteries aren’t as fragile as they look, but they sure can be delicate.
Diagnosing this issue involves more than just eyeballing the battery; testing its voltage with a multimeter can reveal if the new power pack is truly charged and ready. If the voltage reading is under the specified level, the battery is likely defective or discharged. Additionally, ensure the system is not suffering from a faulty connection or corrosion at the terminals, which can sap the battery’s short-lived power.
- Check the connections for dirt and corrosion
- Ensure the terminals are tightly secured
If these are in order, but the battery still refuses to hold charge, the problem might lie within the gate motor’s circuitry—sometimes, a minor system glitch or a failed internal component can mimic a bad battery. Remember, knowing how to replace gate motor battery involves more than just swapping out the old; it’s about ensuring the new one is functioning optimally within your system’s ecosystem.
Safety Tips When Facing Difficulties – When to seek professional help to avoid damage or accidents
Embarking on the journey of how to replace gate motor battery can seem straightforward—until you encounter stubborn glitches or safety dilemmas. A startling 60% of gate automation failures are due to overlooked issues during battery replacement, turning what should be a simple task into a perilous gamble. It’s a dance of delicate parts, sharp tools, and a dash of patience. When faced with persistent problems after swapping the battery, it’s essential to diagnose beyond the obvious. Sometimes, the culprit isn’t the new battery but a faulty connection or internal circuitry that throws a wrench in smooth operation.
Safety must be your top priority. Always ensure the power supply is disconnected before attempting to replace the gate motor battery. Handling batteries with care helps prevent accidents and damage. If difficulties persist—such as the gate still refusing to respond or the system faltering—it’s time to call in a professional. Expert technicians possess the tools and expertise to troubleshoot complex electrical glitches, ensuring your gate’s longevity and your safety are preserved. Remember, knowing how to replace gate motor battery is only half the battle; proper troubleshooting and safety protocols are the true keys to success.
Additional Tips for Maintaining Your Gate Motor Battery
Optimal Charging Practices – Best methods and frequencies for charging the battery
Maintaining optimal charging practices for your gate motor battery is an often-overlooked aspect that profoundly influences its longevity and performance. A well-charged battery not only ensures seamless operation but also guards against unexpected failures that can disrupt your daily rhythm.
To master how to replace gate motor battery effectively, understanding the best methods and frequencies for charging is essential. Regularly inspecting the battery for signs of wear—such as sluggish response or inconsistent opening—can save you from costly repairs down the line.
For optimal results, adopt a disciplined charging routine. This might involve charging the battery fully every few weeks, especially if the gate remains unused for extended periods. Additionally, employing a smart charger that automatically adjusts the charging cycle can prevent overcharging—a common pitfall that shortens battery life. Remember, a careful balance is key: keep the battery adequately charged without pushing it into overcharge territory.
Incorporating these practices into your maintenance routine ensures your gate motor remains reliable and efficient, all while prolonging the lifespan of your investment. Knowing how to replace gate motor battery is vital, but equipping yourself with proper charging habits is what sustains its performance day after day.
Environmental Considerations – How temperature and weather affect battery performance
Environmental factors wield a subtle but powerful influence over your gate motor battery’s performance. In South Africa’s varied climate—where blazing sun, heavy rains, and chilly mornings are the norm—temperature swings can dramatically impact battery longevity. High temperatures accelerate chemical reactions within the battery, hastening wear and potentially causing premature failure. Conversely, cold weather can reduce the battery’s capacity, making it sluggish or unresponsive. Understanding these nuances is crucial when learning how to replace gate motor battery, as it ensures you choose the right time and method for replacement.
To safeguard your investment, consider the environment in which your gate operates. Shielding the motor from direct sunlight and moisture can extend the life of the new battery. For optimal performance, incorporate these environmental considerations into your maintenance routine:
- Ensure the battery is stored in a cool, dry place before installation.
- Avoid exposing the gate motor to extreme temperature fluctuations during operation.
- Regularly inspect for signs of corrosion or water ingress that could compromise battery efficiency.
By paying close attention to how weather and temperature affect your gate motor battery, you’ll better understand how to replace gate motor battery and keep your system running smoothly through every season. Remember, a resilient battery is the backbone of reliable gate automation—especially in South Africa’s dynamic climate!
Battery Disposal and Recycling – Proper disposal methods for old batteries
Proper disposal and recycling of your old gate motor battery not only safeguards the environment but also ensures compliance with South Africa’s strict regulations. Batteries contain hazardous materials, and mishandling can lead to soil and water contamination. When learning how to replace gate motor battery, it’s crucial to approach disposal responsibly.
Many communities offer designated recycling centers equipped to handle used batteries safely. It’s advisable to never throw old batteries into general waste, as this can cause leaks and pollution. Instead, consider using a certified disposal service or returning the battery to your supplier, who often participate in recycling programs. Additionally, some local authorities provide collection days specifically for electronic waste, including batteries.
To make the process seamless, keep your old battery in a cool, dry place until you can deliver it to the appropriate facility. Remember, responsible disposal extends the lifespan of your gate automation system and preserves the environment for future generations.
- Identify authorized recycling centers in your area.
- Always handle old batteries with care to prevent leaks or damage.
By adopting these environmentally conscious practices when learning how to replace gate motor battery, you contribute to a sustainable future while maintaining the integrity of your gate system. Responsible disposal is not just an act of conservation—it’s a testament to respect for the environment that sustains us all.